Arlo Pro 4 Installation Guide
Arlo Pro 4 Installation Guide
This Arlo Pro 4 installation guide is written for beginners and assumes no prior experience with security cameras or smart home devices. By following this step-by-step guide, you will have your Arlo Pro 4 installed, connected to Wi-Fi, configured in the Arlo app, and fully operational with motion alerts, video recording, and smart home integration.
For more details on performance, features, and expert evaluation, see our Arlo Pro 4 review.
What You Need Before You Start
Before unboxing the camera, gather the necessary tools and items for a smooth installation.
Required Items
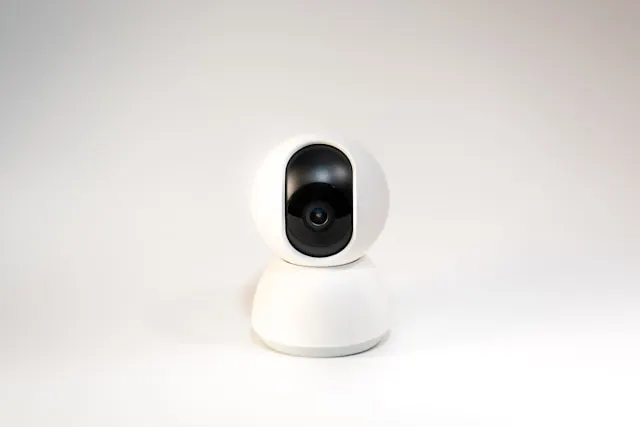
- Arlo Pro 4 camera unit
- Rechargeable battery (included)
- USB-C charging cable
- Magnetic or screw-based mounting bracket
- Screws and wall anchors (included)
- Smartphone or tablet (iOS or Android)
- Wi-Fi connection (2.4 GHz or 5 GHz)
Optional but Helpful
- Drill and drill bits
- Level
- Ladder for elevated installation
- Protective gloves for drilling
Having everything prepared before starting ensures a hassle-free setup.
Step 1: Charge the Camera
- Remove the battery (if not pre-installed).
- Connect the USB-C cable to charge fully before first use.
- Ensure the LED indicator shows the battery is fully charged.
This step is crucial for battery-powered operation to avoid interruptions during setup.
Step 2: Download the Arlo App
- Open the App Store (iOS) or Google Play Store (Android).
- Search for “Arlo” and install the official Arlo app.
- Create an Arlo account or sign in if you already have one.
The app will serve as the control center for your camera, allowing configuration, monitoring, and notifications.
Step 3: Add Your Arlo Pro 4 Camera
- Open the Arlo app and tap Add Device.
- Select Camera and then Arlo Pro 4.
- Scan the QR code located on the back of the camera or battery compartment.
- Follow in-app instructions to connect to your Wi-Fi network.
- Name the camera according to its location, e.g., “Front Door” or “Backyard.”
Naming cameras helps manage multiple devices effectively.
Step 4: Choose Installation Location
Consider the following for optimal placement:
- Cover main entryways or high-traffic areas.
- Avoid direct sunlight or reflective surfaces that may affect video quality.
- Mount at 6–8 feet above the ground for accurate motion detection.
- Ensure the camera remains within range of your Wi-Fi network.
The Arlo Pro 4’s flexible mounting options include magnetic mounts and screw brackets, making placement straightforward.
Step 5: Mount the Camera
Magnetic Mount Option
- Attach the magnetic mount to the wall using screws.
- Align the camera with the mount and snap it into place.
- Adjust the angle for the desired field of view.
Screw Mount Option
- Use included screws and anchors to secure the bracket to the wall.
- Attach the camera to the bracket using the hinge mechanism.
- Ensure the camera is level for proper motion detection and framing.
Proper installation ensures the camera captures the desired area and the AI detection works correctly.
Step 6: Configure Motion Detection
- Open the Arlo app.
- Select your Arlo Pro 4 device and go to Motion Settings.
- Define motion zones to focus on critical areas such as doorways or driveways.
- Adjust motion sensitivity to reduce false alerts.
- Enable notifications for detected people, animals, or vehicles as desired.
Custom motion zones increase accuracy and reduce unnecessary alerts.
Step 7: Set Up Notifications
- In the Arlo app, enable push notifications for your device.
- Choose alert types, such as people-only alerts or general motion notifications.
- Test notifications by walking through motion zones.
Timely alerts allow you to respond promptly to visitors, deliveries, or potential intruders.
Step 8: Enable Video Recording
The Arlo Pro 4 supports cloud storage via Arlo Smart subscription:
- Subscribe to the appropriate Arlo Smart plan for cloud storage and event history.
- Confirm recording settings in the app.
- Test live streaming and video playback to ensure everything is working properly.
Local storage is limited but possible if you use an Arlo SmartHub with compatible devices.
Step 9: Two-Way Audio Setup
The camera includes a built-in microphone and speaker:
- Test audio in the app to ensure clear communication.
- Use two-way audio to interact with visitors, delivery personnel, or pets remotely.
- Adjust speaker and microphone volume in the app if necessary.
Two-way audio adds convenience and an extra layer of security for your home.
Step 10: Smart Home Integration
Arlo Pro 4 integrates with popular smart home platforms:
- Amazon Alexa: View camera feed on Echo Show devices, receive motion alerts, and include it in routines.
- Google Assistant: Receive notifications and control camera functions via voice.
- Apple HomeKit: Add Arlo cameras to the Home app for centralized smart home management.
- IFTTT: Trigger lights, locks, or other smart devices when motion is detected.
Integration enhances convenience and security through automation and voice control.
Step 11: Test the Entire System
Before considering installation complete:
- Verify live video streaming in the Arlo app.
- Trigger motion detection alerts to confirm notifications work.
- Test two-way audio to ensure clear communication.
- Confirm battery level and ensure the camera is correctly mounted and stable.
Address any alignment, Wi-Fi, or app issues now to avoid problems later.
Common Beginner Issues and Fixes
Camera Not Connecting to Wi-Fi
- Verify correct Wi-Fi password and network.
- Move the camera closer to the router temporarily.
- Restart the camera and app.
False Motion Alerts
- Refine motion zones.
- Adjust sensitivity levels.
- Avoid pointing at streets, trees, or areas with frequent non-human movement.
Poor Video Quality
- Clean the camera lens.
- Ensure adequate lighting.
- Verify app settings are configured for 2K HDR video.
Maintenance Tips
- Recharge battery as needed for uninterrupted monitoring.
- Keep camera lens clean for clear footage.
- Update firmware regularly via the Arlo app.
- Check motion zones seasonally to account for changes in surroundings.
- Ensure screws and mounts remain tight to prevent misalignment.
Regular maintenance ensures consistent performance and reliability.
Final Thoughts
Installing the Arlo Pro 4 is straightforward even for beginners. By following this guide, users can confidently mount the camera, connect to Wi-Fi, configure notifications, and integrate it with smart home devices.
The Arlo Pro 4 provides a powerful combination of wireless convenience, high-resolution video, advanced AI detection, and smart home integration. For a detailed expert evaluation, including performance and feature insights, see our Arlo Pro 4 review.
By completing the setup, you now have a comprehensive home monitoring solution capable of protecting your property and giving you peace of mind.